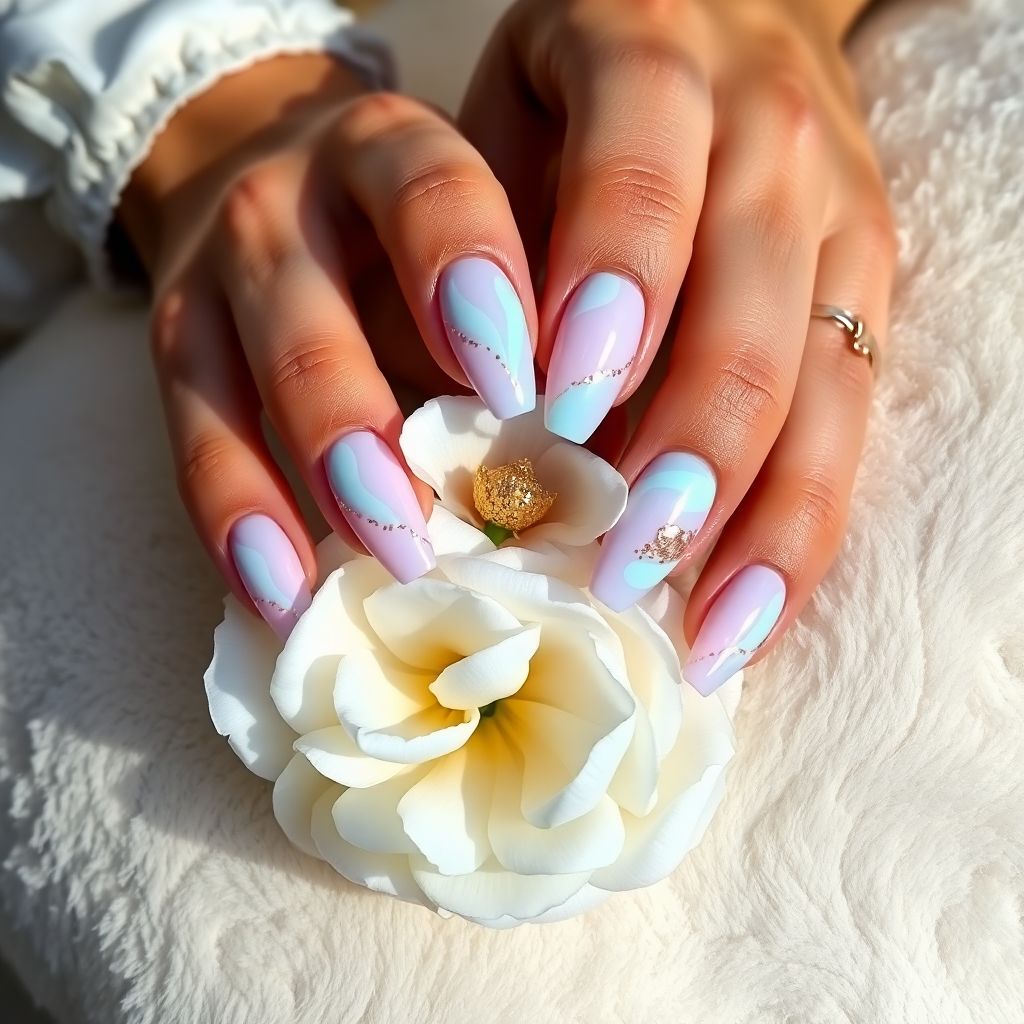
Pastel Opal Glow Nail Art Tutorial
Elevate your manicure game with the dreamy Pastel Opal Glow design. This iridescent look blends soft lavender, mint, and blush tones with holographic flakes and rose gold foil for a luxurious, high-fashion finish. Perfect for spring and summer, it adds a touch of ethereal elegance to any outfit.
What You’ll Need
- Base coat
- Pearlescent gel polishes in lavender, mint, and blush
- Holographic flakes or iridescent micro-flakes
- Rose gold nail foil
- Fine detail nail art brush or dotting tool
- UV/LED lamp
- Top coat
- Nail file, buffer, and cuticle pusher
- Lint-free wipes and rubbing alcohol
Step 1: Prep Your Nails
Shape your nails with a file and gently buff the surface. Push back cuticles and wipe each nail with a lint-free wipe soaked in rubbing alcohol to remove oils and dust.
Step 2: Apply Base Coat
Brush on a thin layer of base coat. Cure under your UV/LED lamp for the recommended time to ensure a smooth foundation.
Step 3: Create Pastel Swirls
Using the fine detail brush, apply small blobs of lavender, mint, and blush gel polish in random spots on each nail. Lightly swirl the colors together with the brush to form an opalescent marble effect. Cure for 60 seconds.
Step 4: Add Holographic Flakes
While the gel is still slightly tacky, gently press holographic flakes onto the nails with a clean brush or cotton swab. Focus flakes in the center for maximum shimmer. Cure again under the lamp.
Step 5: Apply Rose Gold Foil
Break foil into irregular pieces. Press them onto a thin layer of tacky top coat at random angles to catch the light. Cure to secure.
Step 6: Seal with Top Coat
Finish with a generous layer of high-gloss top coat to encapsulate the design and add extra shine. Cure fully, then wipe off any sticky residue for a flawless finish.
There you have it—your gorgeous Pastel Opal Glow manicure is ready to make a statement. This iridescent, trend-forward look works for brunch dates, weddings, or everyday glam. Enjoy your shimmering nails and the compliments that follow!